|
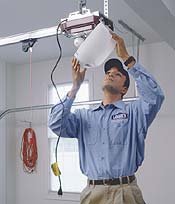
101ways to keep your door working perfectly Original. Author: Deric Davidson of http://www.aqualitygaragedoor.com/ Mon May 20 2013 08:35:36 GMT-0700 (PDT) Outline: Section A 10-springs,5-panels,5-hinges, 5-torsion assembly,5-tracks, 5- cables, 5-rollers, 5-bearings, 5-windows Section B 5- remotes, 5-motors, 5-rails, 5-eyes, 5-emergency release/ travelers Section C 5- hinges, 5-springs, 5- truss rods, 5-jambs, 5-rubbing Section D Contact us- Call a professional once per year. First of all, Thank You for taking a moment to review our work and getting familiar with our brand of service. We do this for you. It brings no greater joy to know that this information is not only useful, but used and if you find it useful, remember, it was our pleasure. Being a repair business, we're constantly concerned with how to get a garage door or opener into working condition. So it makes great sense for us to also compile a list of how to keep garage doors and operators in good working condition. In fact, I've often thought that there should be a list of 101 ways to keep your garage door perfect working condition. Well ladies and gentlemen, here it is! So over the next few weeks we are going to give you little by little, helpful hints, and tips on how to keep your garage door and operator, in perfect working condition. As a do-it-yourself-er or a homeowner calling a service professional, you can look at these tips to educate yourself to ensure that the type of service work that you're getting lives up to the standards that we would hold to be most important. Use these tips, and if you have a other questions please leave them in the comments below each section. Also, this is just a list. It was designed to be only an outline for the detailed information on every topic mentioned. These topics will one day be links to the full observations of field work along with photos of the actual problems we face day to day as repair professionals. Section A: Sectional Garage Doors Garage Door Torsion Springs 1. Lubricate garage door torsion springs. 2. Check balance of door. 3. Check for loose bolts on assembly. 4. Check for broken torsion springs. Is your door not going up? "My door won't open! 5. Confirm a secure spring mount. 6. When buying new: confirm the weight of the garage door. 7. Confirm the cycle life of springs you are getting. 8. Confirm the warranty. 9. Confirm the proper tools are used. 10. Confirm the added parts that may be needed. i.e. two spring conversion bolts or bushing for older Stanley doors. Steel Sectional Garage Door Panels 11. Listen to how your door panels move. 12. Watch if they flex during movement. 13. Check for cracks in your garage door sections. 14. Check to see if the face or the garage door is sliding. 15. Look for rubbing between sections and on tracks. Sectional Garage Door Hinges 16. Confirm the right hinges are in the right place. 17. Identify what strength of garage door hinge came with your door. 18. Check for cracks on the end hinges. 19. Check for sliding of hinges. 20. Lubricate sectional door hinges. Torsion Spring Assembly 21. Check the position of the center spring mount. 22. Do the bolts at the center spring mount have threads. 23. Can the top section come into contact with the torsion assembly? 24. Are the cable lift drums chipped? 25. Are the heads of the bolts closest to the drums rounded? Sectional Overhead Door Tracks 26. Check for door rubbing tracks. 27. Check for cables rubbing tracks. 28. Check tracks at flag bracket for separation. 29. Check track gap against roller depth with door down and up. 30. Don't lubricate tracks. Sectional Door Cables 31. Check cables for fray from top to bottom. 32. Check and lubricate the bottom loop of cable at the Denton Pin. 33. Confirm the cables have positive tension at the open position. 34. Check that the cable tension is proper on both sides. 35. Check for cable strumming the door panel in operation. Sectional Garage Door Rollers 36. What kind of rollers door you have? Get the best. 37. Are they loud? 38. Check for cracks, Pitts, or gouges in your rollers wheels. 39. Check for roller play as a sign of wear. 40. Long stems are best! Overhead Door Bearings 41. Do you have a one spring door? 42. Do you know what the least lubricated part of your garage door is? 43. Check for metal dust around the bearing plates. 44. Check for scaring on the torsion tube. 45. Replace them in pairs. Garage Door Windows 46. Single use window frames. Don't remove without a Plan-B. 47. Know the manufacturer of your door. Every garage door manufacturers windows are a different size. 48. Newer inserts are usually always remove able. 49. Replace with plexi glass when you can. 50. Don't clean the windows. The inserted designs get brittle the older they get. Section B: Garage Door Openers Remote Controls 51. Be gentle with your garage door operator remote controls. 52. Remember security. 53. Check the battery. 54. Check for signal. 55. Check your purse. Garage Door Operator Motor 56. How does the garage door operator motor sound? 57. Check/adjust the opener force. 58. Check for fluid coming out of the motor head. 59. Is there any sound at all from the motor? 60. Does the light come on under the light cover? Garage Door Operator Rails 61. How does the garage door opener rail sound? 62. Does the garage door opener rail look strait? 63. Check for loose bolts on opener rail and motor cover? 64. Check and secure the opener rail mounts at header, ceiling and on activator arm attached to the door. 65. Check and secure all the wires along the rails. Garage Door Operator Photo Optic Sensors/ Photo Eyes 66. Be sure your photo optic sensors are fastened firmly. 67. Make sure the wires are not exposed or dangling. 68. Keep heavy things off of them. 69. Remember the 18" rule. 70. Check the system lights for alignment. "My door won't close!" Garage Door Opener Emergency Release/ Red Cord 71. Do you know how to open your garage door in case of a power failure or malfunction? 72. Do you have another point of access to the inside of the garage in case of power failure of malfunction? 73. Emergency release security. 74. Proper traveler position. 75. Stripped or worn garage door opener travelers. Section C: One Piece Garage Door Operation Wood One Piece Garage Door 76. The major advantages or one piece garage doors have over sectional garage doors. 77. Check door hinges for wear at all five working pivot points and lubricate. 78. Check for bent cantilever arms. 79. Check for set nails. 80. Insure your one piece garage door hinges are safety braced! One Piece Garage Door Extension Springs 81. Check that your springs are not broken. 82. Identify spring size. 83. Check that working springs have proper tension at open position. 84. Make sure the door is balanced throughout the year. 85. Lubricate your one piece garage door extension springs. Wood One Piece Garage Door Truss Rods 86. Check truss rods for tension and door straightness. 87. Confirm all the bolts and nuts are there. 88. Make sure you have a truss rod for each the top and bottom rail(only on wood doors). 89. Proper tensioning. 90. Confirm the center piece is in good shape. One Piece Garage Door Jambs 91. Check the jambs periodically for termites. 92. Check to see of your jambs are secure enough to the house/opening. 93. Does the lock hole line up? 94. Are the jambs made of "one piece" of lumber? 95. Have the jambs ever been bumped by a car? Door Rubbing 96. Do you see any rubbing on the jambs by way of paint scrapings? 97. Does the door hit the ground when it closes? 98. Are there any bushes around the door operational path. 99. Does your one piece garage door sit perfectly vertical in the opening or does it loo slanted in the closed position? 100. Is the top edge rubbing any ceiling areas? Section D: Professional Service Professional Garage Door Service 101. Call a professional if you don't feel comfortable about anything you see here or better yet,call them out once a year to help prevent any of these occurrences. Of course now you are armed with enough info to know if they are doing their job right. :-)
3 Comments
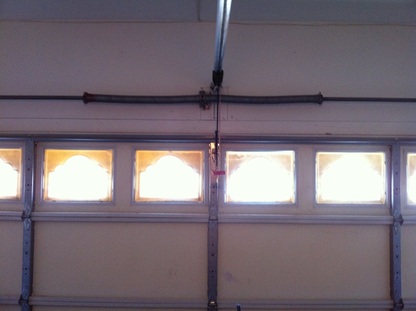
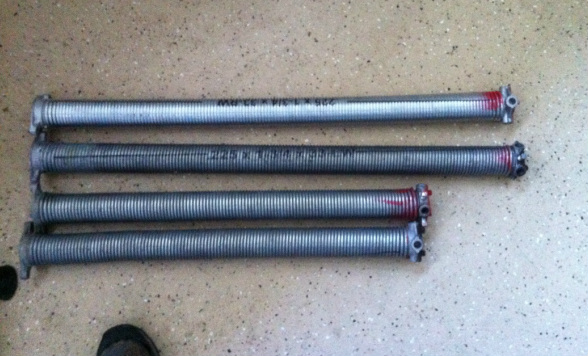
 You all know what a Torsion Spring is right? If you are still learning about them, they are the large coiled things approximately 12 inches above the top section of your garage door on the part of your home known as the "Header". They are about the size and length or your arm and typicallyl located in the center of your door. That said, the real question is,"Why are torsion springs important and what make some different than others?" The importance of your torsion spring starts with the garage door itself. First, the average weight of a steel sectional garage door is about 200lb.s when resting on the floor. Second. gravity, wants to keep it there. So how do we get two hundred pounds of steel in the air? Most people believe it is the opener that does all the work. Although there is some association, the fact is that your garage door opener is only moving your door into an open and close position all the while your door is being suspended. or. counter-balanced the entire time. That:s right, it:s your spring doing all the real work. It:s "The Muscle" behind the moving. Since garage door operators have been getting stronger and stronger these days. some of the strongest have been known to be capable of opening a door with a broken spring, (though often with serious consistences- see miracle door). Especially renowned for this is the Genie screw drive models which are still some of the strongest in the business today. Hence the title given them,"Opener" we are led to believe that they must be a lifter as well, but that's not the case. They were designed to apply no more than 10 lb.s of force to overcome door inertia of starting from a dead stop to general door travel friction only. So the real deal that lifts the steel, is the spring. So now, what makes them different? Well there are three measuring factors to the springs size, but the one I'm going to educate you on today, and the one most important to you is the Length. The length of a torsion spring is the only way one can determine and tale account for the life cycle of the spring. So in essence, if you want your door to open and close more times and increase the value of you investment in your door and home, is to get the Longest springs possible. To give just a bit more detail to that, a cycle in spring terms, is a complete open and close. Also, according to industry charts and measurements, we can effectively increase the cycle life of of your spring life by more than 1000 cycles by adding as little as an inch in length to your spring.Now, most new doors come from the factory with approx. 10,000 cycle springs which, based on how often you use your door, have been considered a 5-7 year use based on today's average household, and there is not much say a homeowner has in that as far as new door installation goes.The good news is that when your spring finally breaks, you can then be very selective in what spring you want to replace it with.  This is a good example of a difference in the sizes of available springs today. This happens to be from a job where another company put on the shorter springs which were way to "Hot" for their 180lb. door. That is a term we use to refer to a door out of balance having used springs pulling up too hard/fast. The customer then asked us to put in springs that would correctly balance their door. So then, how do you insure you are going to get the long life springs? Well, that can be as hard to answer as the applied science it takes to calibrate a low cycle spring to a high cycle spring. You see, the first obstacle is that a long life spring not only cost more to buy, but they are as well heavier to carry around and have available -on hand- in light of today's gas prices. And another thing is that most technicians grumble at having to use their heads and have to be fully trained to make an accurate conversion in the field mostly because, the longer you make a spring, the weaker it gets so now you have to size up in wire size. They just think, it is simply easier to go back to the manufacturer and get the exact replacement and be done with it. That's not how we think! Would you like to see our work? Click "Read More" to see pictures of our work. or Call us today for a better Garage Door Spring Repair. 800-401-9155 Start blogging by creating a new post. You can edit or delete me by clicking under the comments. You can also customize your sidebar by dragging in elements from the top bar.
|
AuthorFeel free to leave a comment or ask an important question or two and we will do our best to respond, right away. Also, it you have an immediate need, call us at 800-401-9155 for FREE trouble-shooting and advice. Archives
June 2013
Categories
All
|

 RSS Feed
